The dovetail joint is a classic. You’ve probably seen it on boxes, cabinets, or drawers. The dovetail is one of the strongest mechanical joints in a woodworker’s arsenal.
It’s a beautiful joint but, depending on the project, can have its limitations. The corner in particular where it meets adjacently to its connecting piece is a little clunky. Like a butt joint.
Also an inside groove that spans the length of the board isn’t concealed with a classic dovetail joint. This might not be a problem for woodworkers that use machines for stop grooves but for hand tool woodworkers like myself, a stop groove can be awkward and time consuming to make. I prefer to simply run a plow-plane straight across.
Luckily there’s a creative way to solve for both of those issues.
Dovetail Examples
This is a standard dovetail. The arrow is pointing to the corner which looks blunt. There is no inside groove on this box but if there was, it would probably extend through the dovetail itself and we could see it from the outside. Maybe it would look a little more elegant with a mitered corner?

This is what it looks like when the inside groove passes through the dovetail joint. It’s not very nice looking. Wouldn’t it be better if we could hide it?

Marking for the Mitered Dovetail
I came across a skillful guide by John Tetreault that explains how to create a mitered corner as well as hide the unsightly inside panel groove.
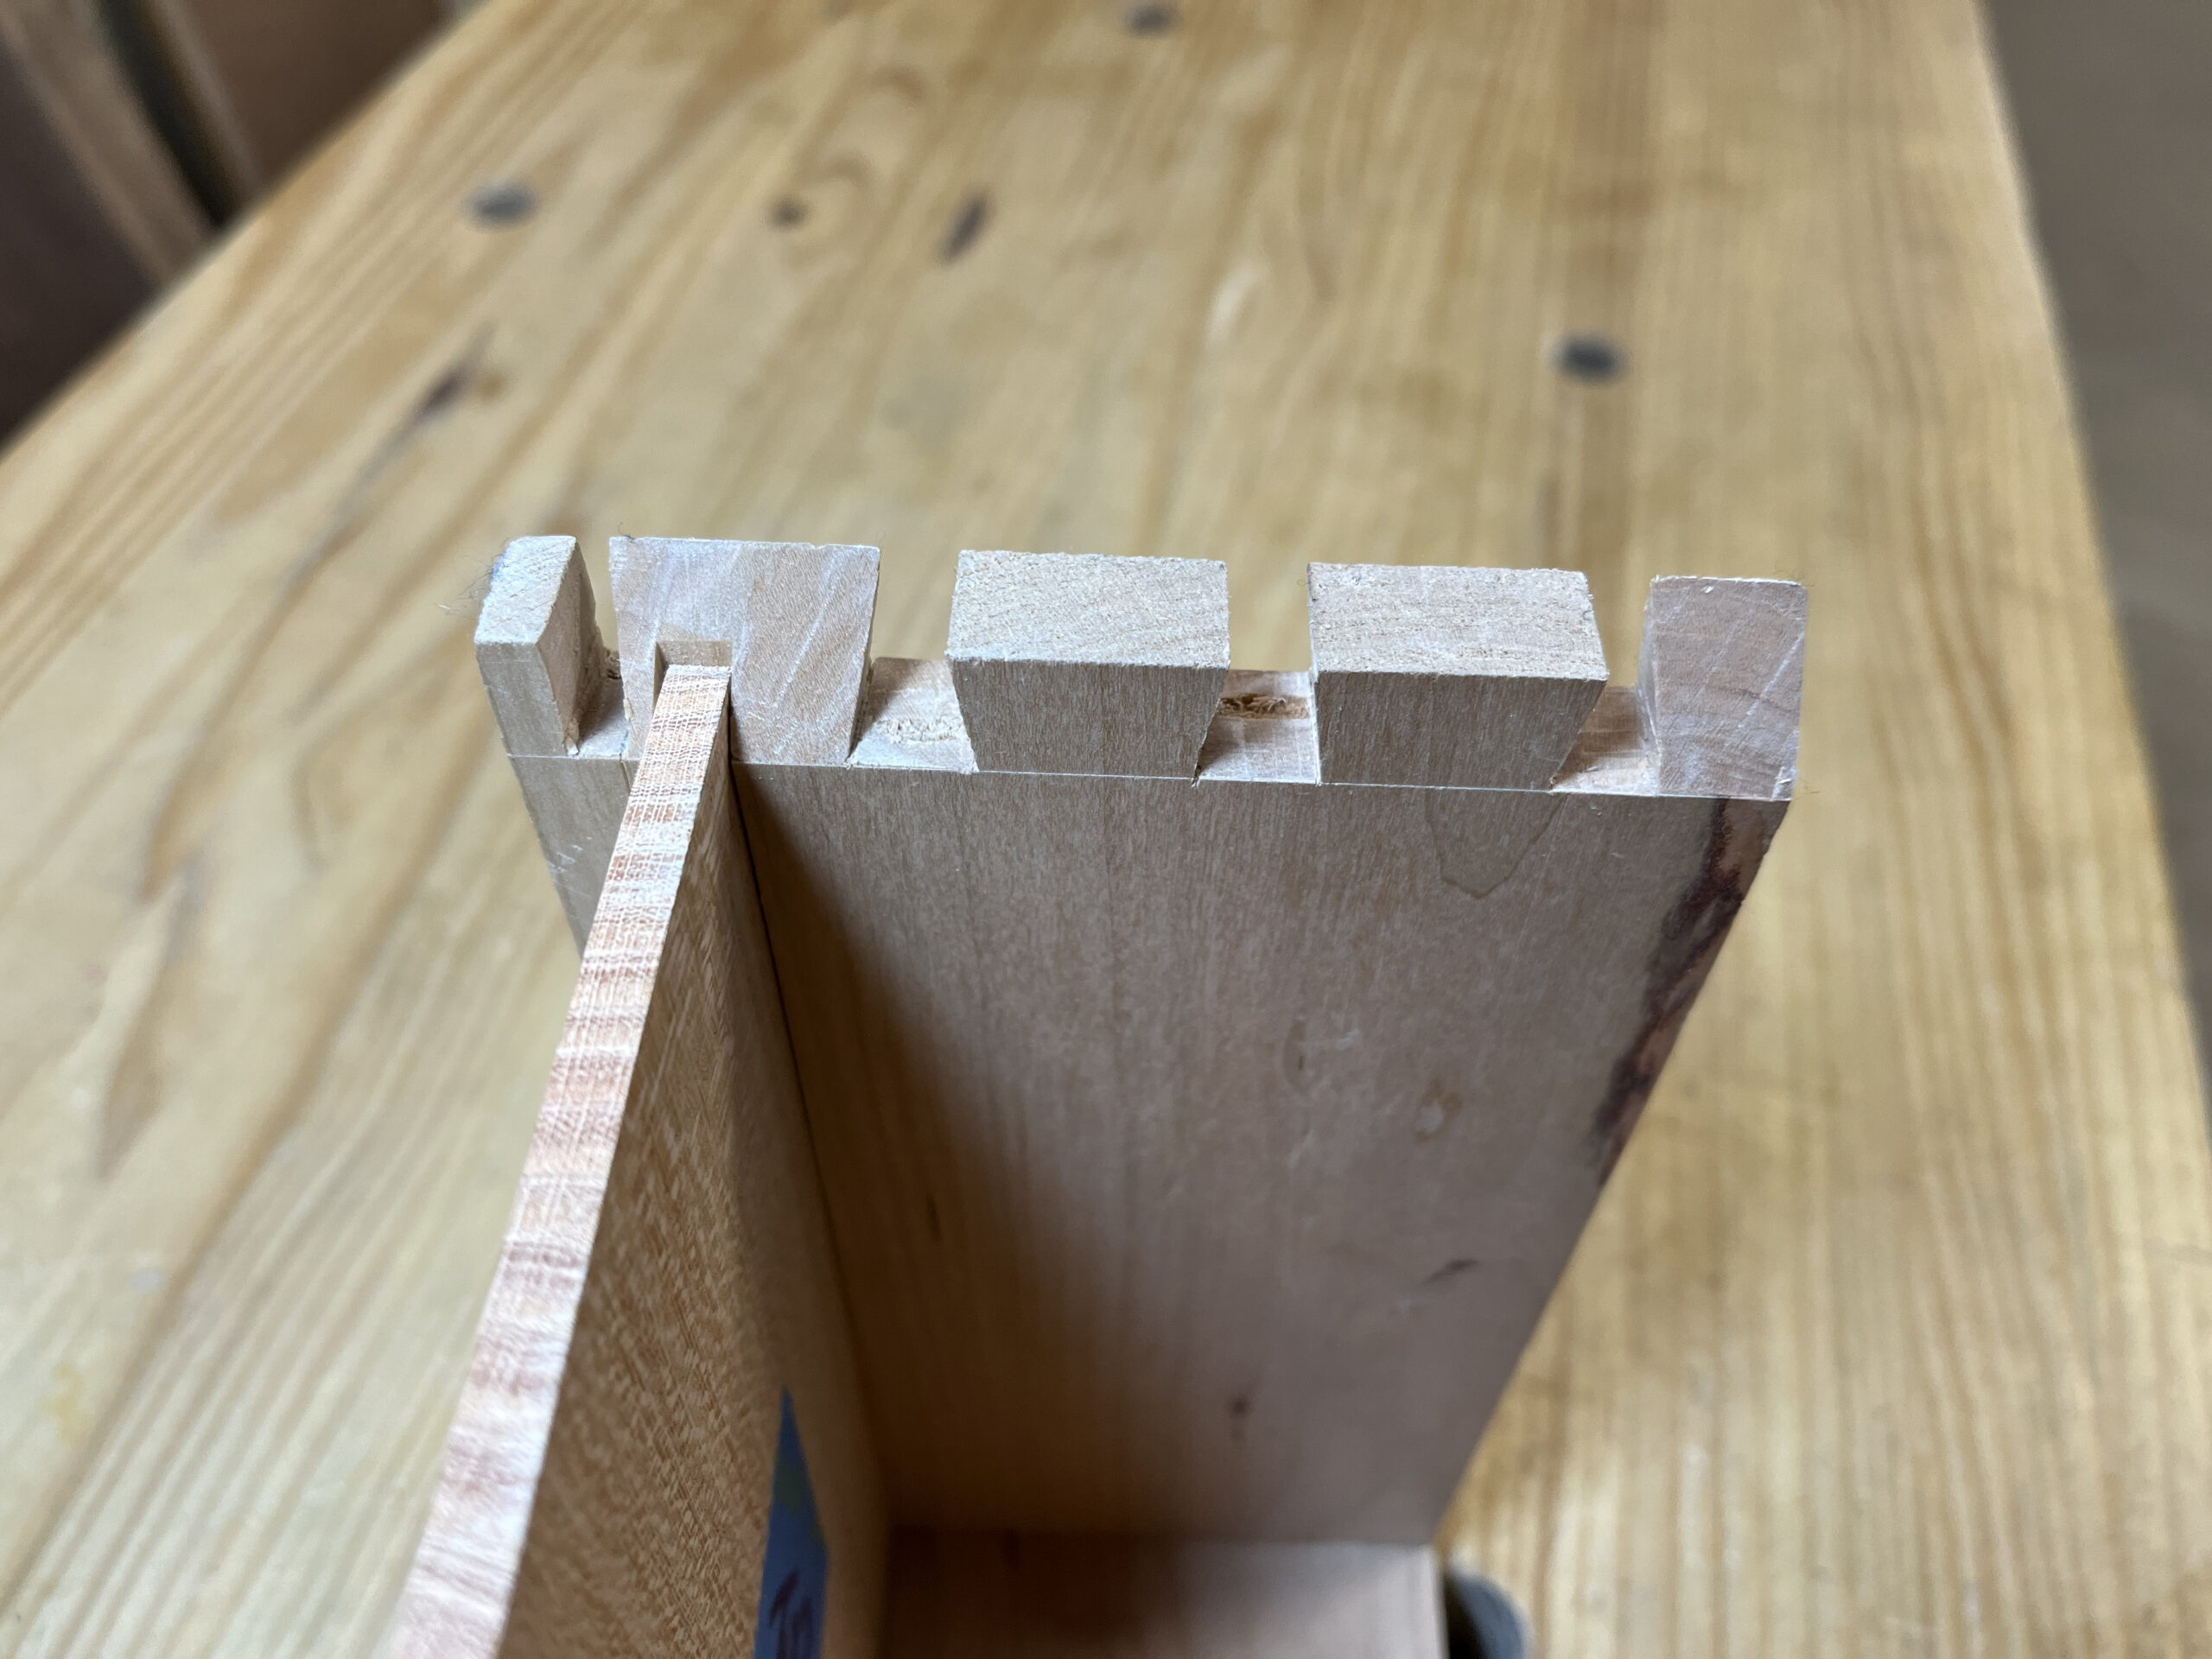
Marking out the dovetails turned out to be just like any other time I marked them out except the corner needs to be at least the thickness of the board itself. This is because the angle from corner to corner for the miter will extend that exact length. If it’s marked any shorter, it will put the miter angle into the pin space.
And on the groove side, I made sure that my dovetail encompassed and extend past the entire groove because this is where we will add another miter.

Mitering the corner and hiding the groove
John’s guide gave a great tip on how to create an accurate miter with a chisel using a 45 degree block guide. After cutting out the dovetails, I made a block guide with a scrap piece of wood and used it for both the corner and the groove miters.

And here is what the dovetail end looks like with the two miters cut along with the bottom panel sitting in its groove.

The pins were a little trickier because you’re essentially needing to combine two pins as well as the place where a dovetail would normally be. Together they form what seemed to me like one “block” to be mitered. This is to conceal the groove from being visible from the outside.
The corner miter is also needing a little more care because it sits flush agains a pin. Cutting straight down to the shoulder line would look strange on the front side so all of these places needing a miter are cut short of outside edge.

Assembling the box
Assembling the box is not any different than with a regular dovetail joint. There are all the usual pitfalls with making accurate cuts but with the added need for precise 45 degree miter cuts as well:

But if this was all done correctly (and I certainly made many mistakes along the way!), an assembled box will have four visible mitered corners like this:

And the inside groove that would normally be exposed on the side are hidden within the dovetail pattern:


It creates a slightly different pattern than the standard dovetail but this seems like a nice approach in scenarios where miters make more sense or are desired.
Leave a Reply