This footstool was my great-grandmother’s (but originally her mother-in-law’s, my great-great-grandmother’s). I don’t know its exact age but there are many clues that suggest that it’s been around for a few years. Great Grandma lived until the age of 100.
When I took possession of it, it was still functional but clearly on its last leg (heh). The joints are no longer tight so it wobbles. And the upholstery is musty and well worn which tells me it provided many days of foot stoolin’.
My plans are to disassemble, refinish, reassemble, and reupholster it. Time to get to work taking it apart!


Disassemble
The layers of cushioning, foam, and fabric came off in a cloud of dust (this was N95 mask territory) and it exposed a very tired old board that was ready to retire:

I was glad to get the upholstery off but seeing the base board underneath, it would need to be replaced. The way it was tacked around the front of the piece may have been what was in style at the time. But when I replace it, I will changes it to be tucked into the top panel.
As I started moving through all of the different pieces, it was obvious where it had been repaired many times over the years. The style of nails and staples I removed could be a historical document. Some antique. Some modern. And they left their mark on nearly every surface:


The doweled joinery had probably come lose over the years from the hide glue drying out. Instead of taking the entire piece apart like I’m doing now, it was easier for whoever worked on it to nail or screw directly into it. It did not make my restoration work any easier though!
Overall though, the dowels came out quickly just by pulling out the nails and rocking it apart.
But oh my, nails, nails, nails…. everywhere:


A fun find during the disassembly were these small leg glides. I pulled them off thinking that I might need to replace them too but they were in great shape. Inside of the little steel rounds it’s stamped “Domes of Silence Patented June 1911”:

After some searching, I found some really fascinating advertisements for the “Domes of Silence” including this 1919 advertisement.


The advertisement says to just apply with a hammer so that’s exactly what I did. ?
Repairs
There were a few places that needed structural repairs. Like this corner that was splitting open from a “repair screw”. After removing the screw, I just glued it back together:


Once I had all of the nails removed, I used 60 grit sandpaper on all the pieces to get the original varnish off.
After consulting with the Mastodon woodworking community hive mind, I decided to leave the nail holes as they were and not fill them in or try to hide them. They will just become a part of how this piece will look in its next life.

Replace Joinery
Turning my attention to the joinery, all of the dowels were in bad shape. I cut the ends off and re-drilled them to accept new 3/8-inch dowels.
The original dowel holes were all too large for new dowels at this point. My replacement 3/8-inch dowels swam in them. So I decided to create plugs, fill them in, and re-drill new holes for the dowels.


It was a little extra work to make plugs (they all seemed to be slightly different sizes) but I can rest easy now knowing that the joinery will be a tight fit again.


With the wood plugs set, I drilled out new holes for the dowels using a forstner bit. The connection was a much tighter fit now and made everything feel a lot more solid:

Refinish & Reassemble
Before assembling, I put the finish on the individual pieces. This makes it easier later so that I don’t have to reach into tight spaces. It sometimes also makes cleaning up glue easier too since glue doesn’t stick to finish very well.

I sanded up to 320 grit and then applied Watco’s Danish Oil. I normally don’t use a finish with such harsh fumes but because I wanted something that would harden and strengthen this old wood, I decided to use that finish which contains oil and varnish. The unique ray-fleck figuring of quartersawn oak wood really came out with it too.
Since I had marked all of the pieces ahead of time, assembling the base went quick. Everything aligned reasonably well.
The last step before upholstery was fitting a new top. The old piece had done it’s job well and now it was time for a new one:


The upholstery was a little tricky because of the four corners. It was difficult to get perfect 90 degree squares but with some basic foam, batting, and a strong stapler, everything came together well.


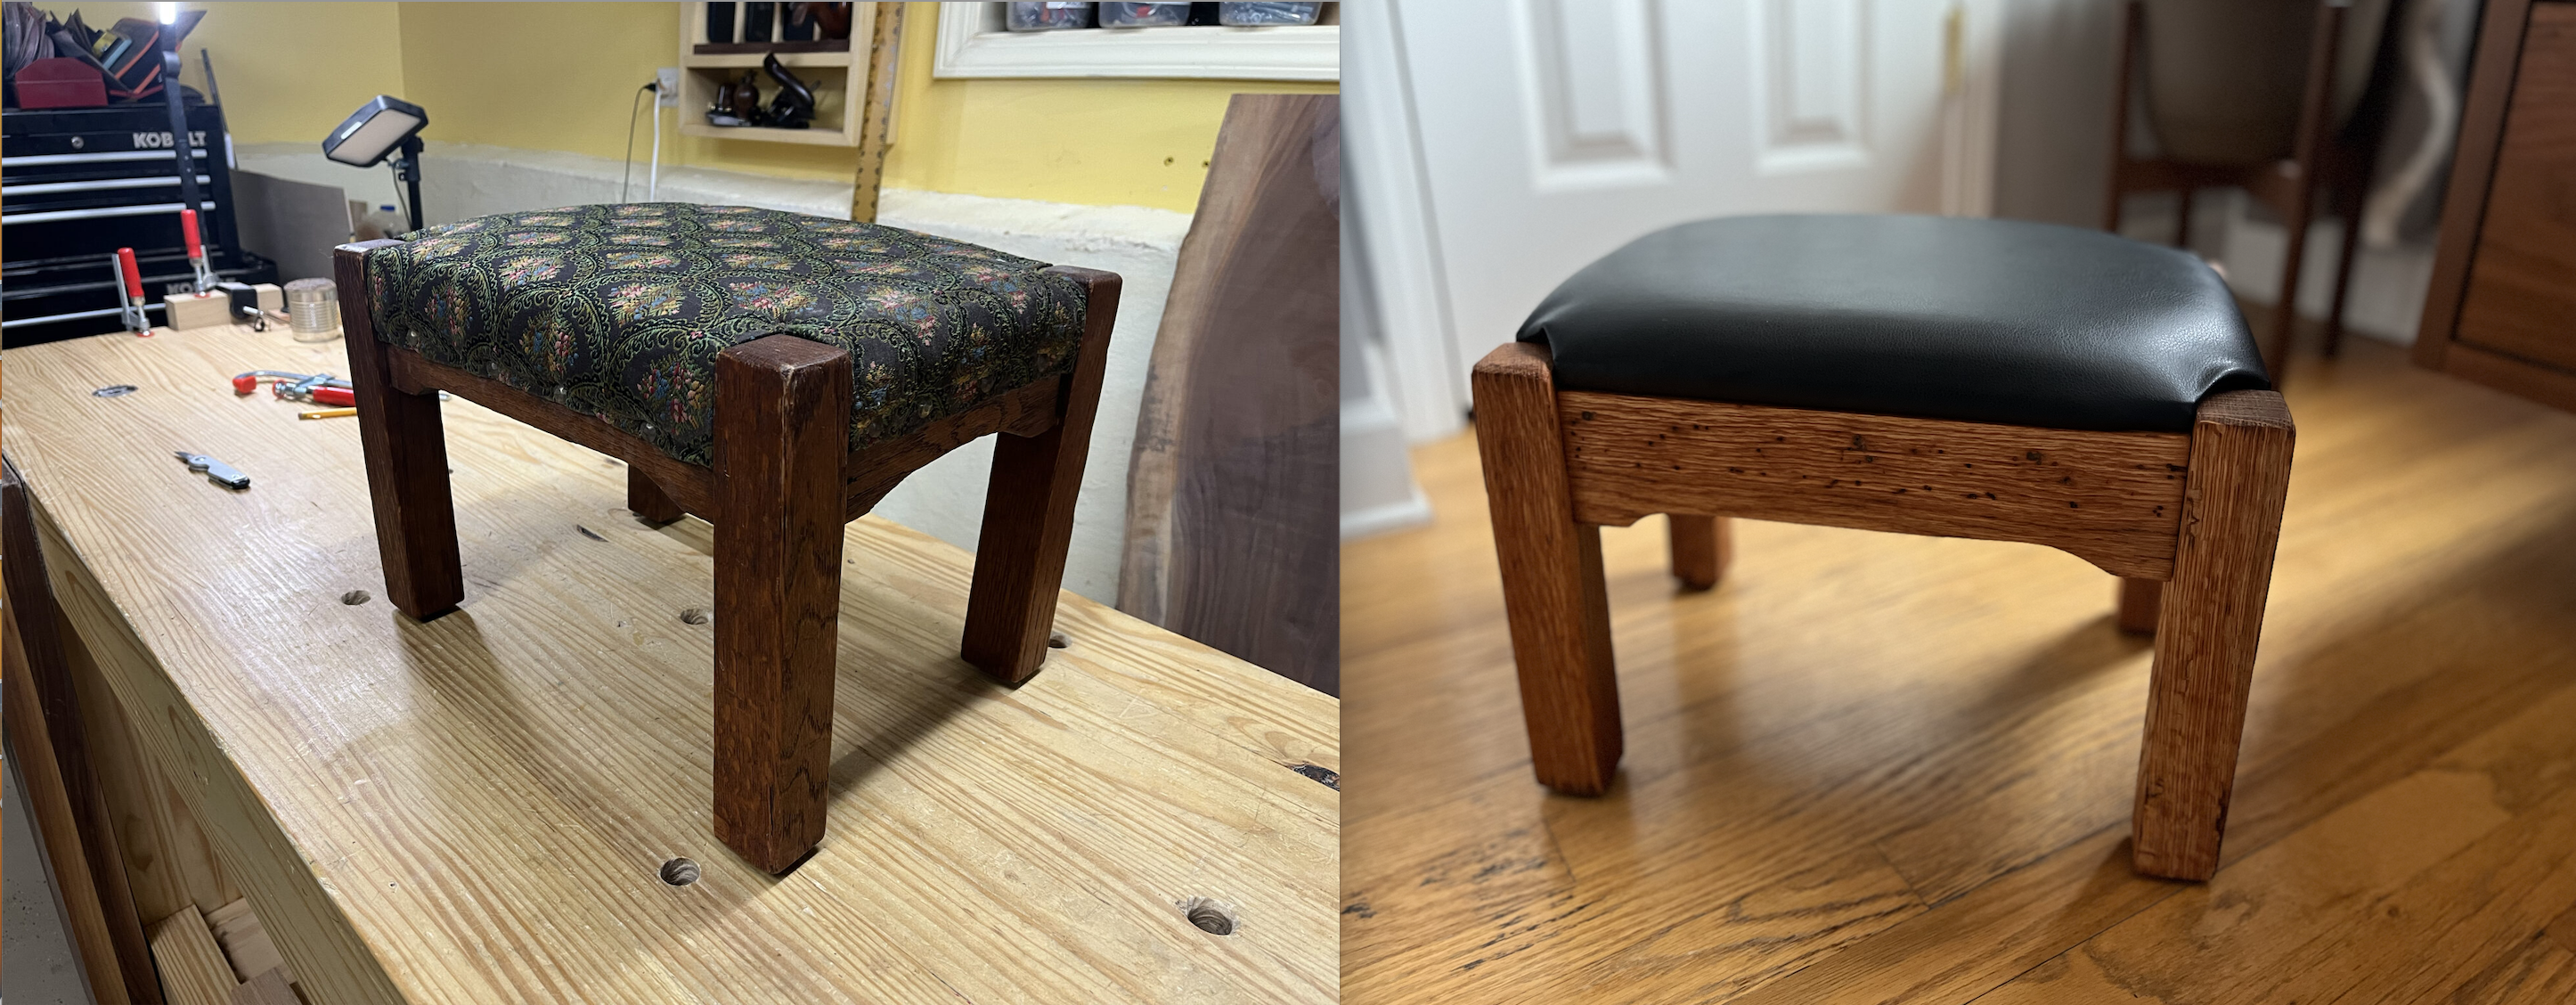
I went back and forth about which type of fabric to use for the new upholstery. In the end, I went with a black faux leather and I’m glad that I did. I think it really rejuvenated the piece.
So here we have it! Our refreshed footstool ready for another many generations of use.

Leave a Reply