Shadow boxes are a great way to preserve objects or display items that honor someone or something. When our dog recently passed, we knew that we wanted to do something for him and after looking at some of his personal things, we thought a shadow box would be a perfect way to honor him.
Step 1: Dimensions
Before heading over to the hardwood store, I wanted to make sure that I had a general idea of how large I wanted make our shadow box. We decided that 12-inch x 12-inch would be enough for what we’d like to display.
Making a full size paper replica of the dimensions made this easy for us to decide. We could simply place or sketch the objects we wanted to display onto the space:

I also spent a few minutes sketching and writing down dimensions for reference. These sketches don’t need to be pretty (they rarely are when I do them!) but having a reference while I’m working is invaluable:

Heading to the hardwood store, our planned dimensions were 12-inch x 12-inch and we needed to purchase wood for:
- the surrounding case, and
- the back panel to hold the items
Step 2: Wood Selection
Because we’re making it out of hand tools, the species of wood was a little more important. I knew that using very hard wood (like Purple Heart or Sapele) would be difficult to work with and tough on my hand tools.
We partially listened to this advice. When we were walking around the store, a Black Locust board jumped out at us and it looked like it would be perfect for the backing. It was already quite flat and it didn’t need more than a quick edge jointing with the hand plane so I felt confident that I could work with it without too much frustration. Otherwise, this species of wood probably wouldn’t be ideal if I needed to do a lot of milling in order to bring it into square.
For the casing, we selected Black Walnut which has a nice balance of workability and beauty.
So our wood list for the shadow box ended up being
- Black Locust board – 1/4 inch thick, 6+ inches wide.
- Cutting this in half and gluing the two panels together on the edges will create a 12-inch panel that we can cut down later to fit as the back panel.
- 4/4 Black Walnut (~1 inch thick), 6+ inches wide.
- We decided that our shadow box would be 12-inch x 12-inch so a board with a length of 6-feet would be enough for each of those four sides that would make up the case.

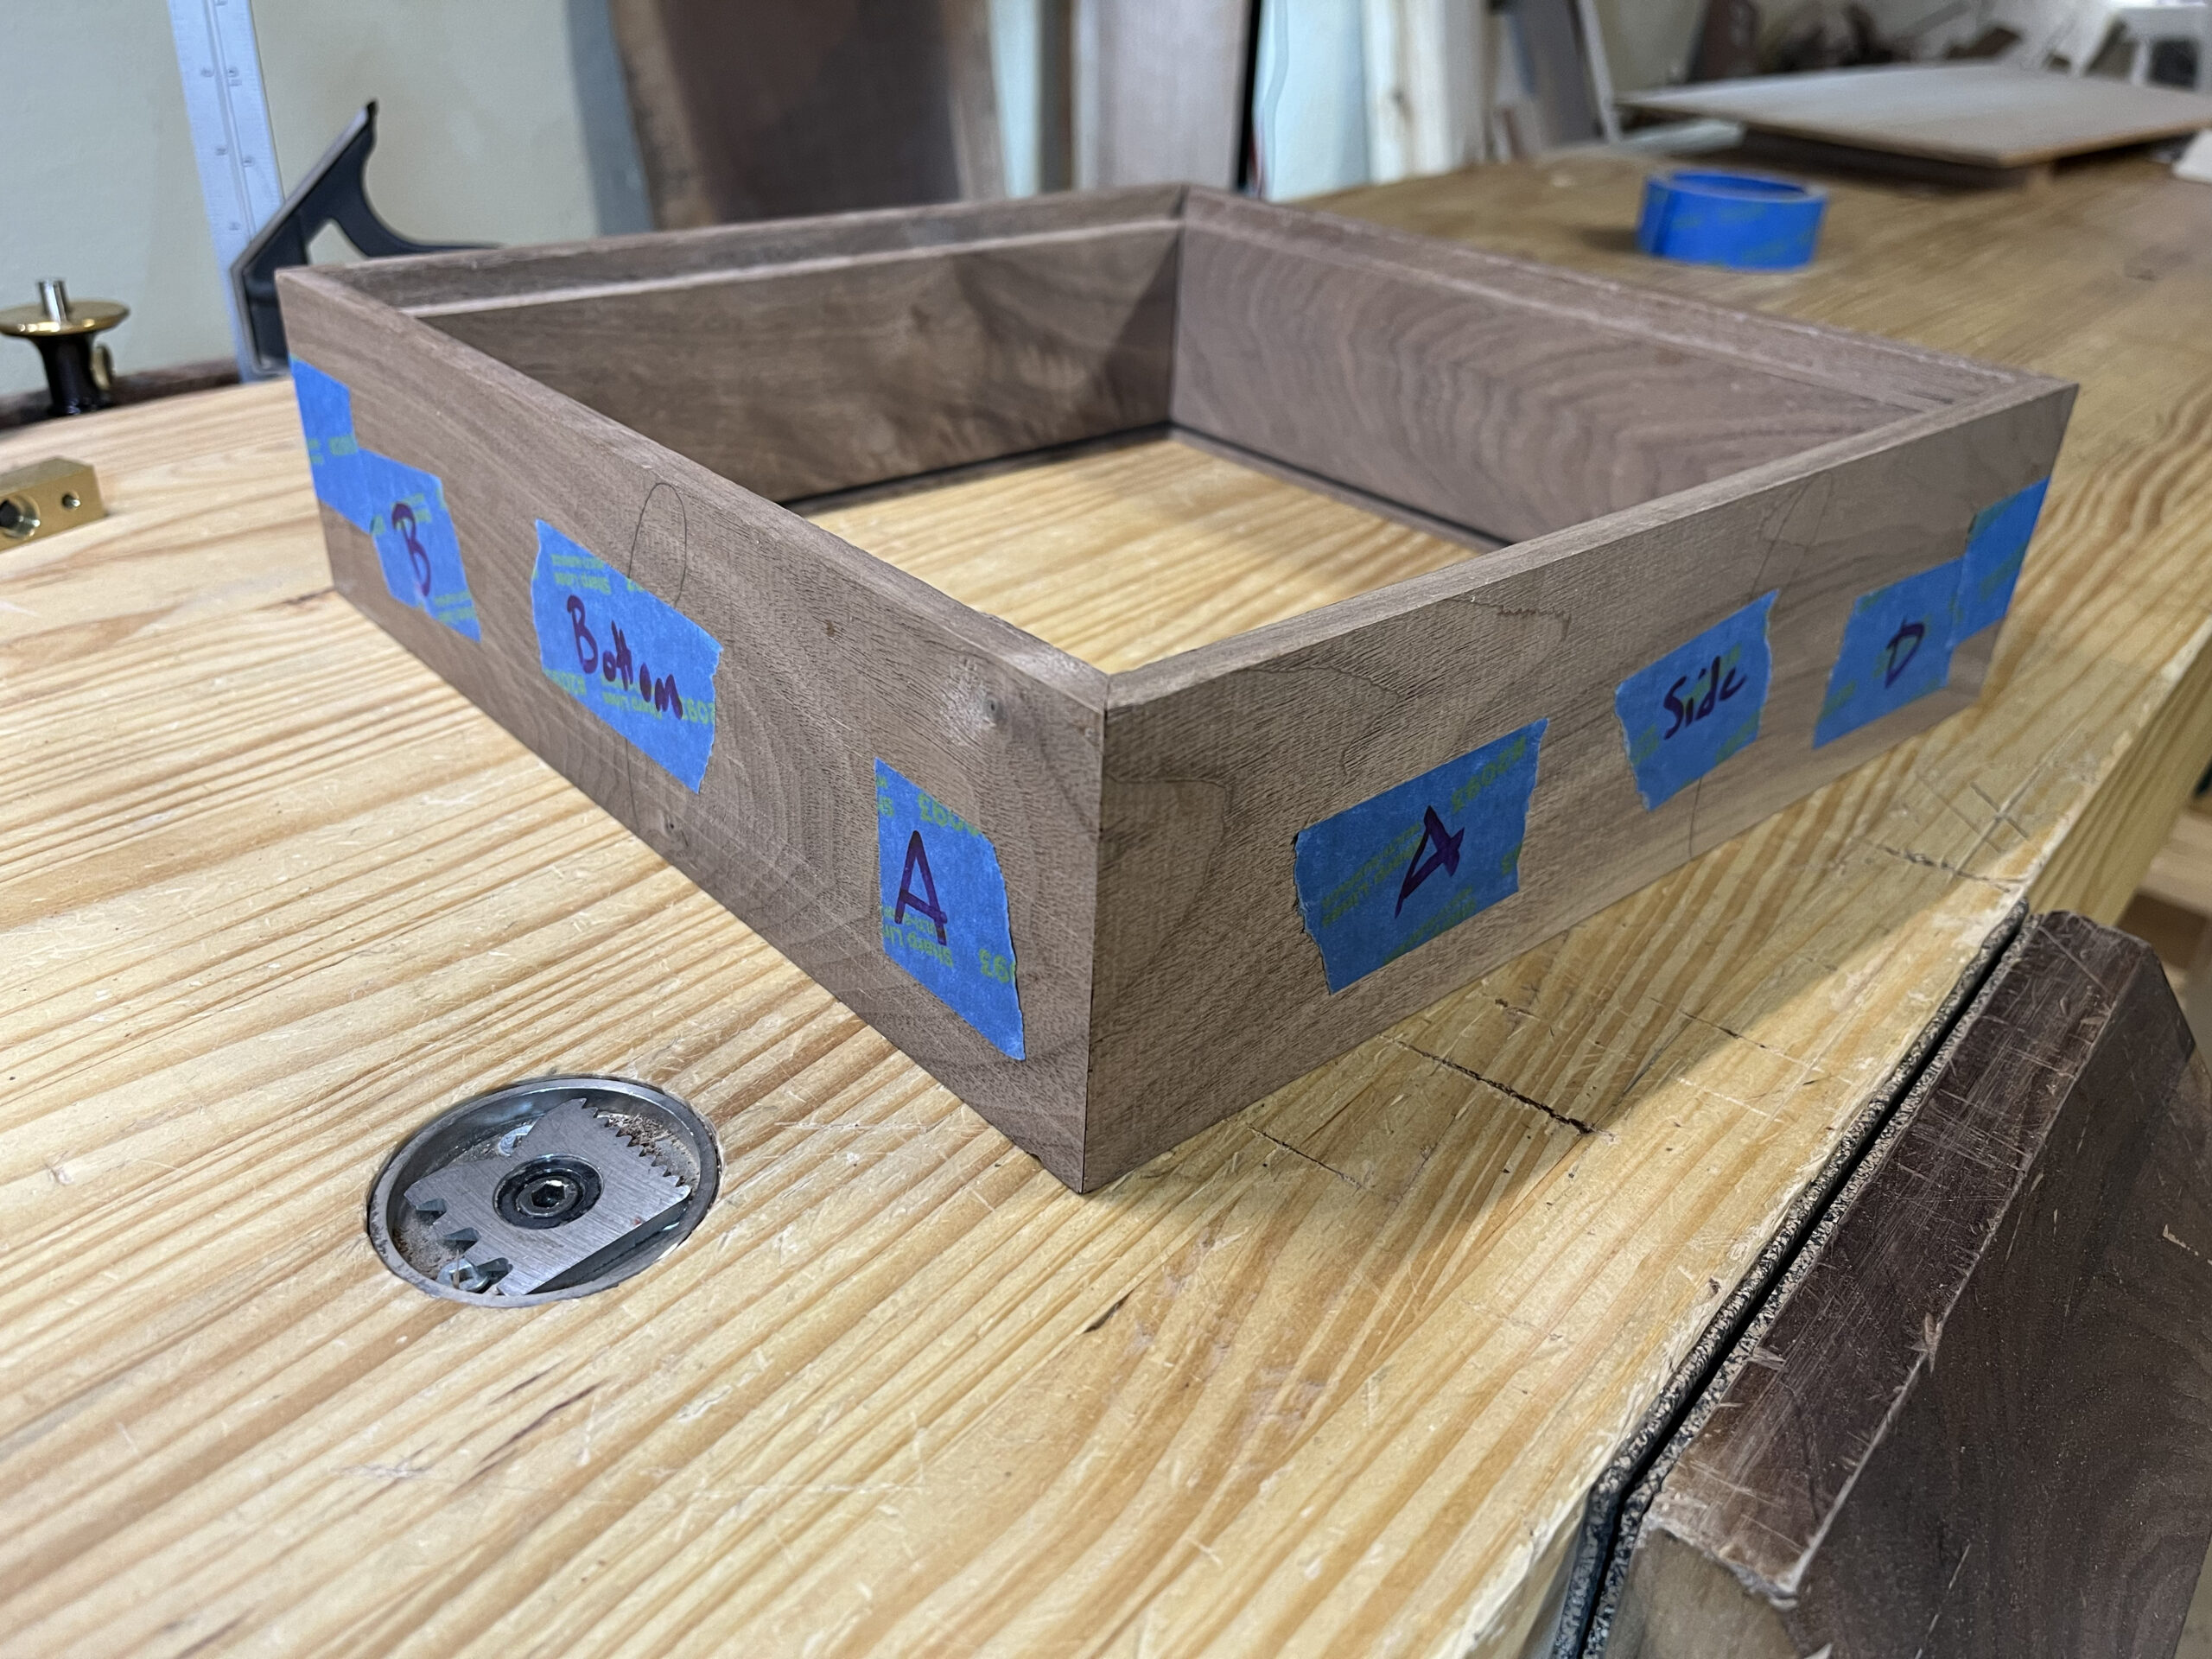
Step 3: Cut pieces
From the walnut board, I cut four equally sized pieces at 12-inches each. From those pieces I made sure they were all flat and thicknessed to 3/4-inch.
After they were all jointed and thicknessed, I rip cut them all down to 3-1/4-inches. There is a little extra depth there to account for the back panel and the front cover taking up usable space inside of the box.
The back panel was edge glued from the halves of the Black Locust. Later, after I’ve made a glue-up of the case, I’ll cut this down so that it fits the back.


Step 4: Rabbet, Groove, and Miters
The back panel will fit into a rabbet joint and the front cover will lock into a groove. Some considerations I made when deciding how to size the groove:
a) how thick is the panel?
b) how will the panel be attached?
With the Black Locust board being 1/4 inch thick, I knew that the rabbet should be at least that deep so that it wouldn’t stick out from the back. I also wanted to used wood screws to keep the back in place so the depth into the walnut board side would need to accommodate a screw head.
With that, I settled on a 3/8-inch x 3/8-inch rabbet.
I used a marking gauge to measure the waste area and used my chisel to create a small shoulder where my saw blade could run across the entire piece. Doing this for both the front and the side created the perfectly sized dado. And with a little help from a router plane, it was uniform and even on all four case pieces.


For the groove, a plow plane makes this work quick (and super fun). I again used my marking gauge to lay out the location except this time it’s 1/8-inch from the edge and a 1/8-inch depth. The front cover will be fully encased by the walnut (as opposed to the back board which we want to be able to remove).
I think if it wasn’t such a stable piece of walnut, I would place the groove further back from the edge (1/4-inch at least) because there is a risk of the thin strip of wood cracking or chipping out.

Both the rabbets and grooves are now complete:

To create the miter joints, I had previously marked a 45 degree angle from the corners of my pieces and connected the two lines as a guide.
I forgot to take a photo of this process but you can see here that I have made the miter angle marking before I started on the grooves and dados. I prefer doing it in this order because it’s difficult to mark the miter angle with parts of the corner removed.
You can see where I have a strike mark on my pieces already to show how deep the angle of the miter will go:

After cutting out most of the miter joint waste with my hand saw, I used my miter shooting board to clean it up.
The dry fit looked good:


If you’re curious how to make a miter shooting board like I have here, check out the miter shooting board instructions by K.G. Wells. Originally printed in Woodworker Magazine (1964), I have really gotten a lot of use out of the one I built based on those instructions.
Step 5: Sanding and Finish
I find it much easier to apply a finish to a project before all of the pieces are assembled. Doing this saves you a lot of trouble later when you need to get finish into small spaces and it also helps with cleaning up glue that might squeeze out. Glue doesn’t stick to finished wood as well and I can usually wipe it off with water easily.
I sanded the walnut from 80 grit to 220 grit. I wanted to keep the piece more matte looking and so I didn’t feel like I needed to go any higher.
For finish, I’m using Odie’s Oil and applying it with an ultra-fine Scotch pad. Then I buffed it off with a lint free microfiber cloth.


Step 6: Glue-up and Front Cover
For this shadow box, the back panel will be removable so that items can be accessed.
The front display though will be fixed within the 1/8-inch grooves that we made earlier the the plow plane. To do this, I started by gluing up only the bottom miters. That will allow the top open to slide the front cover into.

Instead of using glass for the front, I decided to try these plexiglass sheets instead. I haven’t ever worked with glass before (let alone cutting it to size) so this felt more comfortable to me for the time being.
After the bottom miters had finished drying, I cut the plexiglass to fit into the frame from the top:

There was some risk of glue finding its way onto the plexiglass corners so I tried to guard against this as best I could with some tape and I did my final glue-up for the top of the frame. Finger’s crossed.

Step 7: Back panel and display items
Cutting the back panel to dimension wasn’t difficult (I use this Japanese pull-saw) but one thing to be aware of is that the panel may not fit exactly into the back square. This is because the miters may be a half degree off or so. In these situations, I will just make a mark where the panel should align so that I’ll know each time where the sides fit:


With the back panel sized, I could start laying out the items to display. We wanted to attach a collar so I marked out a chiseled couple of sections that it could loop it through for displaying.

With just some small hardware additions for hanging, we have a shadow box ready for display!


Leave a Reply