A woodworker’s bench is the most important piece of equipment in a shop. When I first started woodworking, I attached a small 6 1/2 inch Irwin woodworking vise to a wobbly old drafting table and got to it.
But hand-planing on an unstable surface causes more frustration than it was worth. Not to mention poor clamping surface area and a table height that felt I was reaching up to chop mortises.

This worked out fine for half a year but as I moved on to larger projects, it was becoming a hinderance to my progress.
I read the book Anarchist’s Workbench which inspired me to build my own Anarchist/Roubo style workbench. It’s a challenging build for many but it would be especially challenging for me almost entirely using hand tools to build it. The following is a photo log of that build process.
Step 0: Prep before it begins.
What do you do when you need to make a workbench but you don’t have a workbench to build it on? I bought two 3/4″ thick plywood boards, ripped them down the middle, and laminated the four peices together (about $60 total). Added a couple of saw horses and had a bench!
It was even thick enough (about 3″) to handle holdfasts and heavy enough (about 100 lbs) to allow me to hand plane 8′ boards.

September 5th, 2022
The southern yellow pine arrives. I should have made frequent visits to the home store to find good clean boards for this build but I didn’t want to take 6 months to do that (plus the car won’t fit boards this size). I rolled the dice with a special order of #1 S4S SYP 16 foot boards that I will cut down to 8 feet lengths.
Some of them are perfect but a lot of them are garbage; knots, some with cracks, and all of it very dry. I might still need to source more SYP later. But onwards.

The top before it becomes the top
I sorted all my 8 foot cuts and picked out the cleanest of the bunch. These were the chosen 18 that will be the top. They are already at 4-6% moisture so I just let them sit a few days in the space.
Next I need to get them square, thicknessed, and ready for lamination. I do not have/want a mechanical thickness planer so this will be a workout.

A big setback a few weeks later. ☹️
I had made it through dimensioning about three boards when we got hit with a major storm and flash flood (much of which ended up in our basement). The wood chips everywhere are evidence of my hand plane work (and an absolute nightmare with them sticking to everything).
I rushed to save as much as I could from floating away and put the project on hold while we cleaned it all up.

A week later and back at it. Bags and bags and bags of shavings.
Hand planing is a lot of work but if I was using a thickness planer, this would all be dust particles so my lungs and ears are grateful too. My arms on the other hand….

Oct 14: Top lamination begins.
I did the glue-up in 3 sections over one weekend (here is one section).
At this point I’ve planed and jointed by hand all of the top boards as close as I could get them. A couple of them ended up twisting and cupping pretty bad from the flood and I couldn’t get them back into square without making them too small so I have 17 instead of 18. The dry fit put the top depth at 21.5″ (half an inch short of the AW specs) but after a month of squaring up 8 foot boards, I was ready to accept a half inch loss.
This is a messy step (nearly a gallon of glue was used) and I used every clamp I had. I even went and bought two more parallel clamps because my cheap bar clamps were barely doing anything on these bundles.

Left: Cleaned and flat-ish.
Right: Just after glue-up dried.
The AW guide says to run each glued-up bundle through a thickness planer and jointer with the help of an assistant (each weighs 80 lbs). But with a sharp scrub plane and a No. 7 jointer (and carefully rotating the bundles around), the hard glue knocked off quickly and they were all flat enough for final glue-up.

The three top chunks are all flat-ish and I adjusted for square as best I could. Once these are glued up, it’ll be much harder to move around so I was trying to make it easier for myself later.

Final top lamination.
I have seen many video and build logs for roubo benches and the one thing I was really worried about with using hand tools was how this top glue-up was going to turn out. How much would it shift and move? I’ve seen people build huge sleds for routers and one guy that used a tractor with chains (wtf!?) to lift and move his top chunk into a giant mechanical planer.
But it literally just took me an hour on each side to scrub this chunk down to “flat enough” with a helper (hi honey!) to flip it. Don’t overthink it.

Oct 18: The day I started working on the base was a magical day.
Four legs, 4 pieces each, 16 pieces total. I picked through my remaining SYP to cut out the cleanest parts for the legs. I used a circular saw to try and save some effort. These are 30 & 27 inches which should make a 32 inch high bench.
With the top behind me, everything started to feel so much easier. Handling 8-foot boards was challenging but now I’m working with much smaller pieces. It’s like when you run 10 miles one day and then the next day you run 5 miles. Both are hard but the 5 miles feel so much easier after what you just went through.

After getting the leg stock down to size, I started to dry-fit the pieces and noticed my circular saw cut all of the ends slightly crooked. This was a huge problem because it meant none of the tenons or mortises would be accurate.

Shooting board to the rescue.
I thought I was saving myself time with the circular saw but I would have saved more time if I had just cut everything by hand with the pull-saw and could skip this shooting board part completely.

I did learn my lesson after that though. The pull-saw made really quick work of leveling the leg base. I don’t know why I was stressing so much about using it. It took just a few minutes to cut straight through it here perfectly flush. No power tools necessary.

Oct 28, 2022: Leg glue up.
I tried to follow the guide closely and use painters tape to stop glue from squeezing into the stretcher mortise. It sorta worked. I still had to scrape some out.
The book also says to use some “skinny nails” to keep the inner laminations together. I skipped that. It just felt weird to put any kind of nails into the bench.

The leg glue-up was super stressful because I was really paranoid my tenons would slip out of alignment.
I’m also nearly out of glue already. That gallon goes faster than you think.

Getting ready to put in the short stretcher mortises. I marked them using a marking gauge (for the 1 1/4″ distance from the edge), the length aligned with the long mortise using the combination square, and then just measured the 1 1/4″ thickness.

The first time my Forstner bit went straight through and exposed the opposite mortise, I panicked a little. The book just says “they will intersect” and no other description of what this really looks like so I started thinking I marked this out wrong. I didn’t expect to see half of the short-tenon mortise blocked by the back of the long-tenon mortise and I still have another inch to go for depth.
Anyway, I’m here to tell you not to panic. You’ll just need to hack out the back of that with your chisel to get your mortis to its final depth.

Almost 2 months into the build and I have legs.

And a few days later, stringers. These were the last of the pieces that I needed to dimension by hand and I was really happy to be done doing that for a while.

Fitting the stringers. This moment felt really good. It was all starting to come together until I discovered…..

…the top wasn’t deep enough for the base.
Remember when I said that the flood warped my last good eight foot boards so I used 17 instead of 18 for the top? It put the depth at 21.5″ (short of the specs) and I forgot to adjust my stretchers so I’m paying for it now.

It was for the best though. I got a cleaner board than what I had originally and laminated it to the top. Now I had a full 23″. An annoyance that cost me an extra couple of days to fix but I felt good about it after.

Drawboring prep. I bought some 5/8″ diameter dowels online and pointed them with a hatchet, as one does.

I trimmed off the gnarly edge after that. I learned my lesson with the wonky-cutting circular saw so I spent a few extra minutes doing this by hand with the pull-saw. It turned out fine.

Another stressful step. Drilling for the drawboring. I don’t have a drill press and I could have done it with a hand drill but I compromised and used a power tool + 5/8″ Wood Owl bit. I figured after all that hand planing, I could treat myself.

November 5th, 2022: (2nd month)
A huge moment. Dry fit of the base. The pegs are tapped in just enough to get the pieces to stay together while I aligned everything and marked out the bench top mortises.

The leg mortises were by far the most annoying and labor intensive part of this entire process. I would rather have been hand planing 8 foot boards again. The end grains are brutal. The bashing is loud. It’s physical. It’s messy. I hated it.
I would eventually learn to get my drill bit as close to the end grain as I could so there was less for me to chisel out there but this step was still a major pain regardless.

Nov 12: Starting the leg vise install. Benchcrafted Crisscross Retro & Glide C.

The Benchcrafted instructions start by saying “The Crisscross is a simple mechanism” and I guess that’s true. But that’s followed by 40 pages of diagrams with walls of text. Yeeesh.
The first time doing this felt really hard. Mistakes were made and triumphs were triumphed and now that a lot of the mystery is gone, it doesn’t seem that difficult. But there were a few missteps along the way.

For example, I made the leg mortise 1 inch shorter than I intended even though I marked a line at the bottom where it should have been measured from. I think I just got really turned around from the pages and pages of text and lost track of what I was doing.
I read the instructions (for the twentieth time) and verified that I could just cut out the bottom inch allowing the arm to go down to the floor. Not beautiful but it works still.

Getting a little fancy with walnut for the chop.

Nov 15, 2022: Assembly
The guide recommends hide glue for the mortis and tenon assembly because of its long open time and easy cleanup. So that’s what I did.

Drawboring went ok but I should have made the pegs a few inches longer than the plans said. Lots of pounding and they just barely made it through flush on each side.

This is just before trimming up the peg ends and then ready to flip.

Flipped! It took two of us to rock it off the sawhorses. It’s an actual workbench now!
Time since the build started: 2 months, 2 weeks, and 1 day
Things left to do:
- Final flattening of the top
- Attach the vise
- Install the shelf
- Install the planing stop
- Drill the holdfast holes
- Put on a finish

Cat tax.

I flattened the top a bit more and then added the bottom shelf.

I was going to shape the body of the chop but I ended up just trimming it to make it level with the bench and putting a 50 degree bevel on the top (with a jack).
Maybe I’ll come back to this one day and shape it fancy but for now, I kind of like it rectangular.
The last thing I did here was attach the crubber that came with the vice using epoxy and called it a day. Yes, the epoxy stunk just like the book said it would.

And the hits keep on coming. When I was installing the bench stop, my drill bit broke inside of the pilot hole. User error because I was trying to extend it further than it should and it wasn’t sitting in the chuck far enough. Not a big deal but it made me laugh thinking about how far I had already come.

The first holdfast hole I did splintered pretty bad with just the power tool so after that I used a hand drill to get them started and then finished it off with the power tool.

Tool rack
A few months ago in my wood buying naivety, I bought a couple pieces of “Patagonia Rosewood” on sale because I thought it was actual rosewood. It seemed like a great deal. It turns out the wood is awful to work with using hand tools (the actual name is Curupay) so it’s just been sitting in my wood pile going to waste.
I found a use for it though. It looks really similar to walnut so it matches the vise chop. It still sucked to work with though.

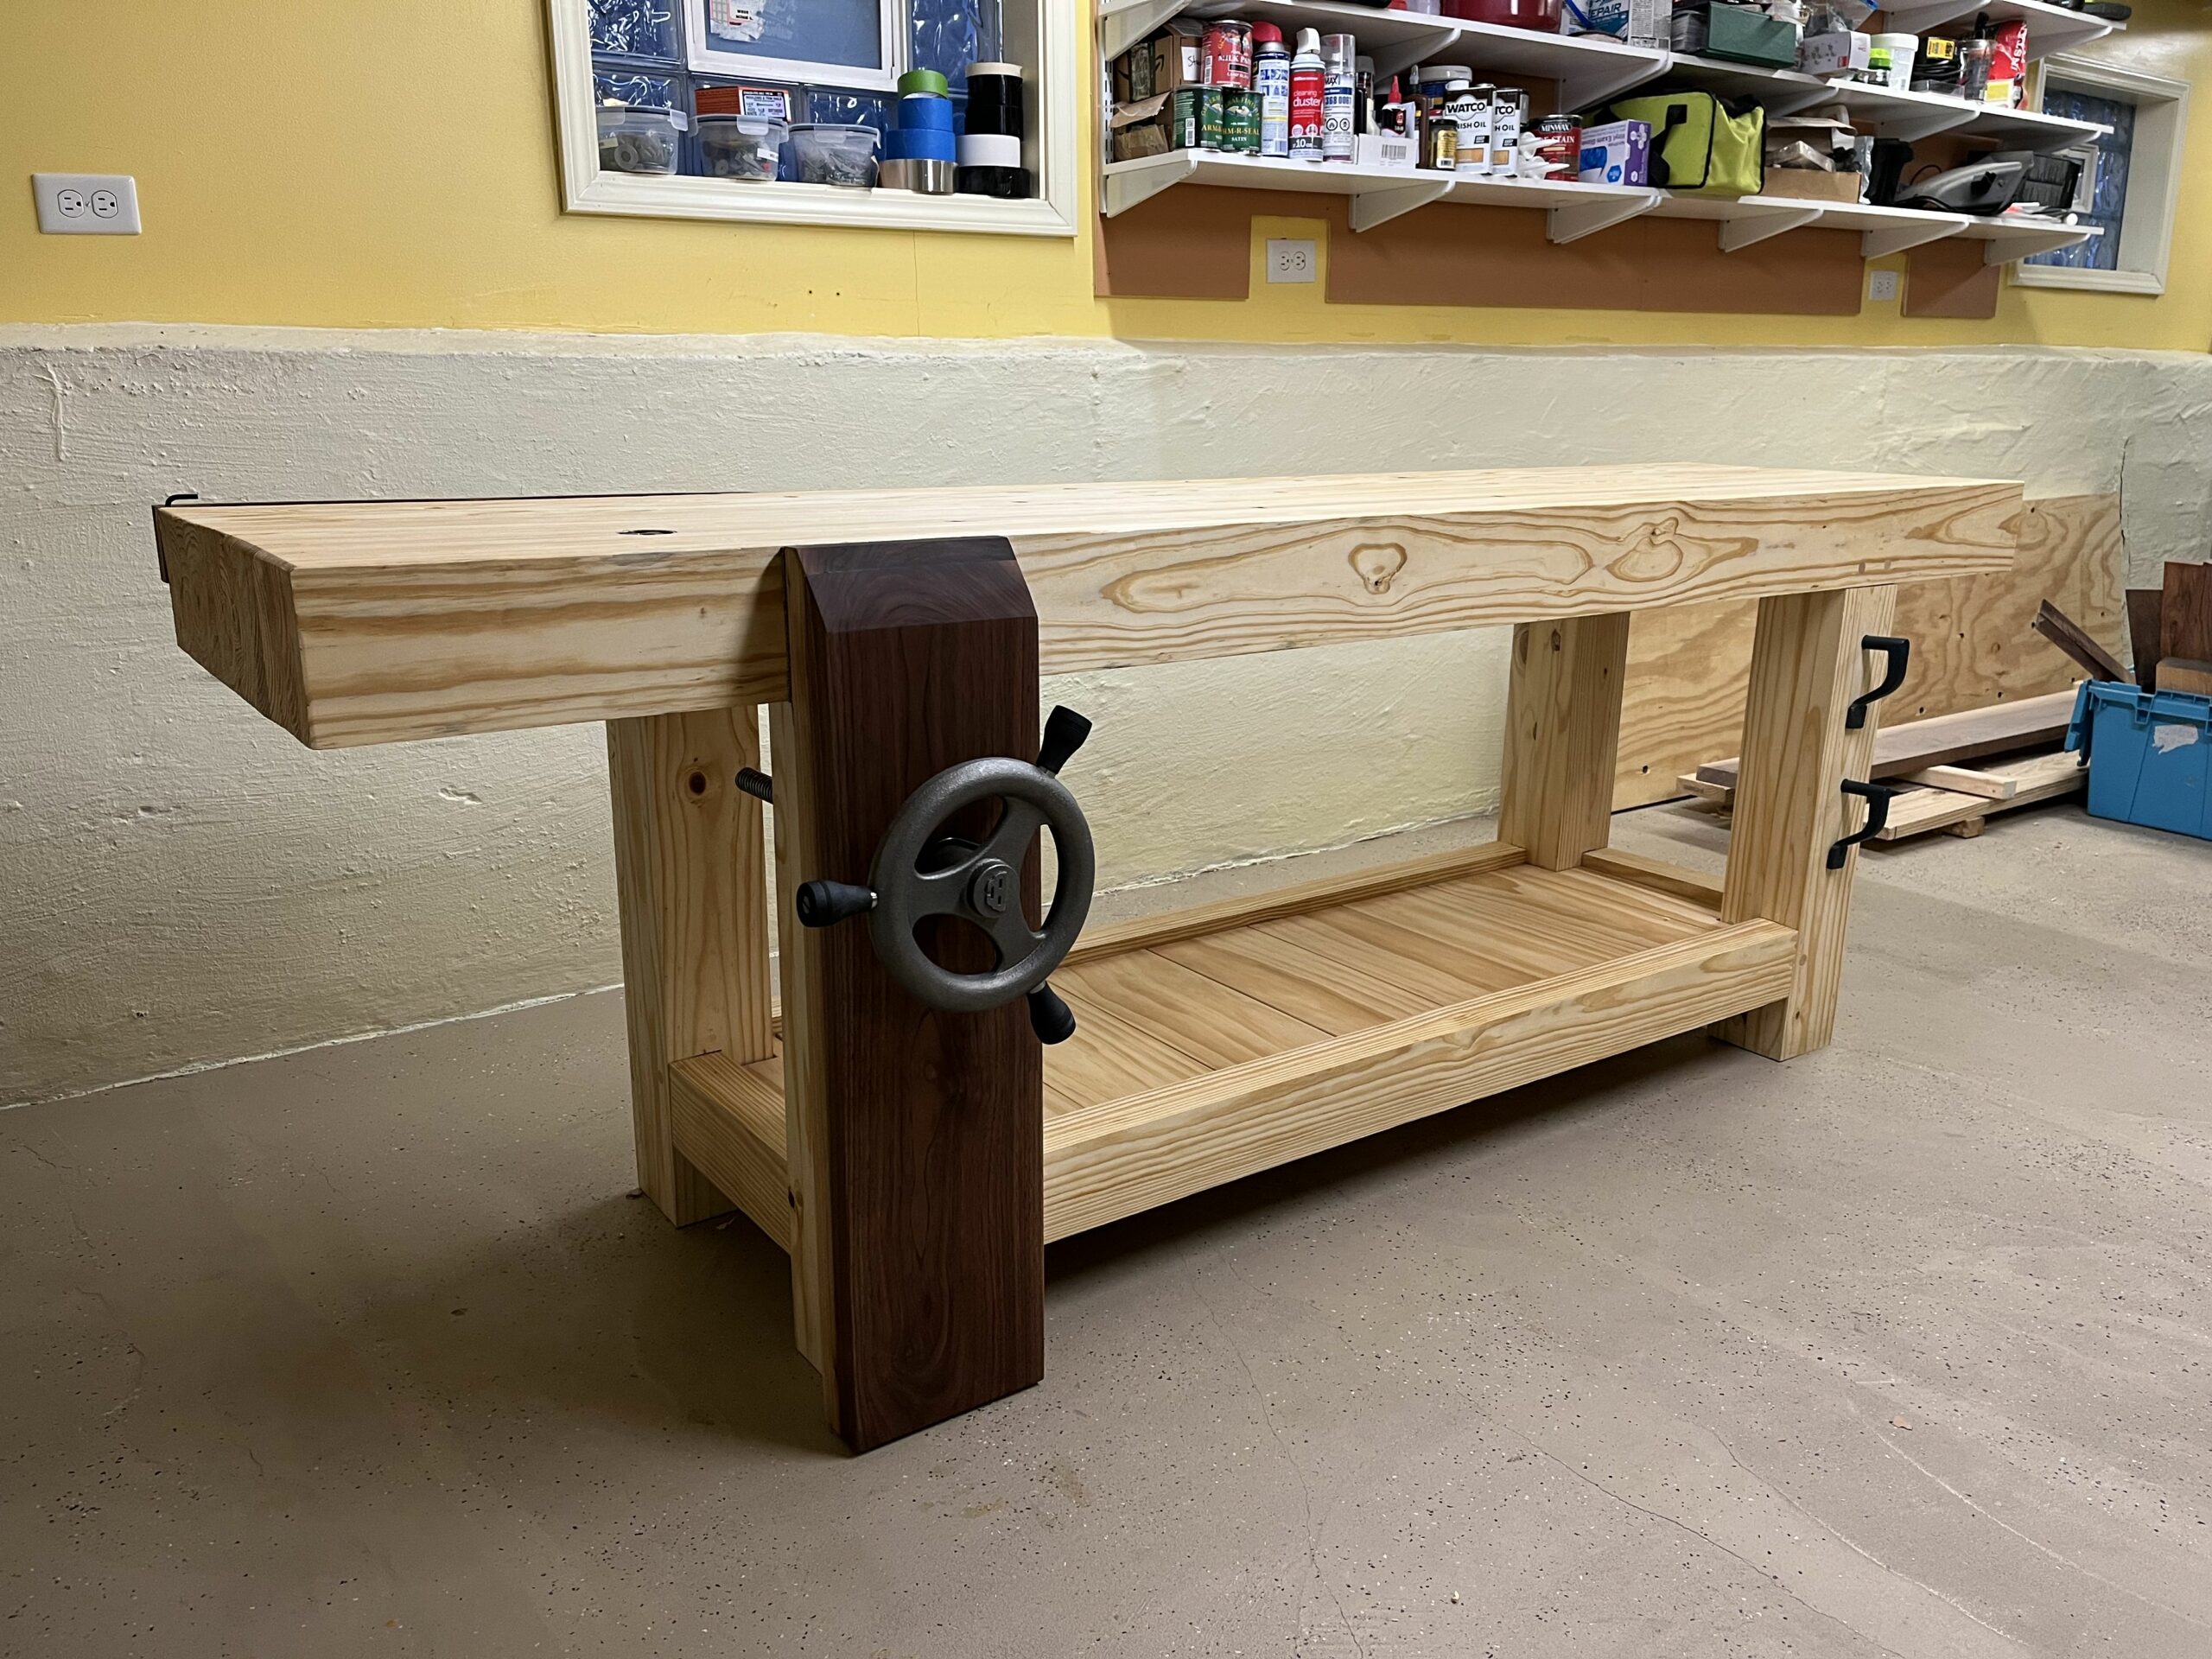
Danish oil for finish. Look at how that walnut glows.

November 19th, 2022
With a couple coats of Danish Oil, I’m calling the build complete. 2 months, 2 weeks, and 5 days (but who’s counting)

Leave a Reply